Showing posts with label new bloggers. Show all posts

Tuesday, August 14, 2012

Techy Tips on Tuesdays

Did you miss our tips last week?!?

Well....we are back!!


Truth be told, I am finding it more and more difficult to come up with more "tips" each week!

Thankfully, one wonderful gal asked a question:  How do I get my button and grab box to appear in a post as opposed to my side bar!

So here we go!

Step 1:  Open up a new post and head to the HTML section.


Step 2:  Using the code we learned here, paste the button code and grab box code.


Step 3: Add the center tags before and after both the button and grab box code.


Step 4:  Head back over to Compose and add in any information to your post.


Your post with added button / grab box should look like this now:


Do you have any questions??  Email me or leave a comment!!


Linking up to these great parties:)
Share

Tuesday, July 31, 2012

Techy Tips - Grab Box for your Button

Happy Techy Tuesday!!!


In case you missed it, last week we talked about how to make a button.

Now let's add a grab box for your button so that others can take your button code and add it to their blogs too!


If you remember from last week, this is the code we used for our button:

<a href="http://www.twosasters.com" target="_blank"><img src="http://i1226.photobucket.com/albums/ee412/TwoSasters/USbutton.jpg" border="0" alt="Photobucket" height="125" width="125"></a>


To make the grab box code, copy your button code above AND add the following in green before and after your code:
<textarea>  YOUR CODE HERE </textarea>

In my example this is what it would look like:
<textarea><a href="http://www.twosasters.com" target="_blank"><img src="http://i1226.photobucket.com/albums/ee412/TwoSasters/USbutton.jpg" border="0" alt="Photobucket" height="125" width="125"></a></textarea>


Using what we learned last week and our new grab box code above, let's put them together.  {Note that your button code is listed twice because you want your button to appear on your site as well we be available for others to "grab" it as well.}


Your finished product!


Note that if you would like to center everything, you could always add the <center> tags.  Remember from way back here.


 Happy Techy Tuesday!!  See you all next week:)

Linking up to these great parties:)
Share

Tuesday, July 24, 2012

Techy Tips - Buttons Part 1

Happy Tuesday!  Are you ready for another Techy Tip?


I was looking over my past Techy Tips posts and realized I never did a post on how to make a button for your blog or shop!

So here we go.

You can do this many different ways, but I will show you using PicMonkey:)

Step 1:  Start off my uploading an image to PicMonkey.


Step 2:  Resize the image into a square.  Any size will work.


Step 3:   Add text and save.


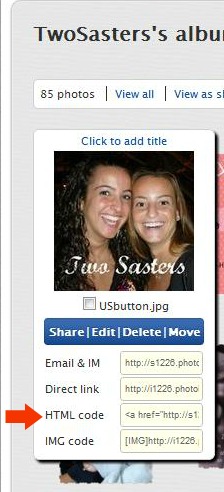
Step 4:  I saved this image to my Photobucket account, just like we talked about here and copied the HTML code.


Step 5:  Head back over to your blog's dashboard.  Under Layout, select "Add a Gadget".


Step 6:  In the Gadgets menu, select HTML.


Step 7:  Paste your code (a control-V will do the trick) and save.


Step 8:  Change the HTML so that when a user clicks on your button they will go directly to your site.

Replace what is highlighted in RED with your site's address

<a href="http://s1226.photobucket.com/albums/ee412/TwoSasters/?action=view&amp;current=USbutton.jpg" target="_blank"><img src="http://i1226.photobucket.com/albums/ee412/TwoSasters/USbutton.jpg" border="0" alt="Photobucket"></a>

It will now look like...

<a href="http://www.twosasters.com" target="_blank"><img src="http://i1226.photobucket.com/albums/ee412/TwoSasters/USbutton.jpg" border="0" alt="Photobucket"></a>


Step 9: Resize your button.  I usually do a 125 x 125 button, but you can choose any size you like.

Add height and width as shown in BLUE.


<a href="
http://www.twosasters.com" target="_blank"><img src="http://i1226.photobucket.com/albums/ee412/TwoSasters/USbutton.jpg" border="0" alt="Photobucket" height="125" width="125"></a>

Step 10:  Save and admire!


You will have to come back next week for Part 2 - adding a grab box so that others can place your button on their blog!

See you then!


Linking up to these great parties:)
Share

Tuesday, April 17, 2012

Techy Tips on Tuesdays - {Hyper}Links

Last week was our first Techy Tips on Tuesday where we shared some Basic HTML Tips.


Now that we have established some basics, we can move onto hyperlinks.  A hyperlink is simply just a link to another page or image.

The HTML code for a hyperlink is simple:

<a href="www.yourURL.com">TEXT to display to reader</a>

The RED text is the URL, or website, where you would like to send your readers.
The BLUE text is the text that you would like your reader to see.


For example...

Let's say in a post you are referencing your blogs name and you would like to link it up to your blog homepage.

The code would be as simple as this (using our site as an example):
<a href="www.twosasters.com">Two Sasters</a>


If I copy that code into my "Edit HTML" tab of my post editor, I would get this:

When a user clicks on the text "Two Sasters", in the above example, they will be directed to our homepage.

In most cases, you will be directing your users to a different site.  To make your hyperlink open up in a new window (usually a good idea when directing users away from your site) is done by adding one more piece of code (in purple below).

<a href="www.yourURL.com" target="_blank">TEXT to display to reader</a>


Going back to our example, it would now look like this:

<a href="www.twosasters.com" target="_blank">Two Sasters</a>


Once again, this could have been done in the "Compose" tab of the post editor, but we want to continue getting more familiar with HTML code.  When creating things like buttons with text boxes (which we will get to in a future post) or social icon buttons with links (also a future post) we cannot solely rely on the "Compose" tab.

Thanks for stopping by and talking a little more about HTML:)

Share

Tuesday, April 10, 2012

Techy Tips on Tuesdays - Basic HTML Tips

Welcome to our first Techy Tips on Tuesdays!!!


Before we go into more specific "How To's", I thought it would be best to first start off with some HTML basics.


Many Blogger users may type posts in the "Compose" tab of the Post Editor (as do I).  This translates what you type into HTML code.  You could just as easily write up your post in the "Edit HTML" tab.


Using the "Edit HTML" Tab, let's try out various HTML "codes" that will alter the way your text works.  It would be a good idea for you to play around with them - getting comfortable writing HTML code - and see for yourself how they will change your text around.


I will start off  by typing the text "Hello World" - which would look like this.
Hello World

♥ Bold: <b> Hello World </b>
Hello World


♥ Italics: <i> Hello World </i>
Hello World


♥ Underline: <u> Hello World </u>
Hello World


♥ Strikethrough: <strike>Hello World</strike>
Hello World


♥ Center: <center>Hello World</center>
Hello World


♥ Left Align: <p align="left">Hello World</p>
Hello World


♥ Right Align: <p align="right">Hello World</p>
Hello World


♥ Change Font Size {numbers 1 to 7}: <font size="2">Hello World</font>
Hello World


♥ Change Font Color {see here for more choices}: <font color="red">Hello World</font>
Hello World


♥ Line Break: <br>


♥ Horizontal Line {used to separate sections}: <hr>


Note that you could have {more easily} done most of these things in the "Compose" tab of the post editor, but the point here is to get comfortable with HTML code.


We are so happy that you stopped by and hopefully can walkaway with a little more knowledge then you had:)


Share
Related Posts Plugin for WordPress, Blogger...